The Complete Guide to Setting Up a Home Pottery Studio


The Complete Guide to Setting Up a Home Pottery Studio
Everything you need to create a functional, inspiring space for clay at home.
Setting up a home pottery studio is one of the most exciting steps in any ceramic artist’s journey. Whether you’re a beginner wanting a dedicated practice space, a hobbyist ready to level up, or a seasoned potter seeking convenience at home, building your own studio lets you work on your schedule, explore new ideas freely, and create with fewer limitations.
The good news? You don’t need a huge space or enormous budget. With thoughtful planning and the right tools, you can transform a spare room, basement, outdoor shed, or corner of your garage into a fully functional pottery studio. This guide walks you through everything you need to get started—from wheels and kilns to ventilation, storage, workflow, and safety.
1. Choosing the Right Space
Before you buy equipment, choose a workspace that supports the rhythm of clay work. Consider:
• Floor Type
Concrete is best—it’s easy to clean and can handle splashes, clay dust, and the weight of kilns and worktables. Avoid carpet at all costs. If concrete is not an option look into temporary flooring that can protect the floor underneath, while being waterproof.
• Water Access
A sink is ideal, but not required. Many potters keep a water bucket system near their wheel and use a utility sink, bathtub, or hose for cleanup.
• Airflow & Ventilation
Pottery dust should stay out of your living areas. Choose a space that can be ventilated or closed off from the rest of the home.
• Power Source
Most equipment runs on standard 120V outlets, but some kilns require 208/240V. We’ll break that down below.
If you’re tight on space, don’t worry—many potters successfully run home studios in 6' × 6' corners, closets converted into wheel nooks, and small backyard sheds.
2. The Pottery Wheel: Your Central Tool

A pottery wheel is usually the first major purchase for a home studio. When choosing a wheel, consider:
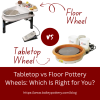
• Wheel Type
- Floor Wheels: Ideal for permanent studio spaces.
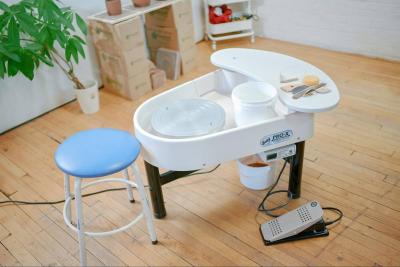
- Tabletop Wheels: Perfect for small studios or hobbyists who need to store their wheel between sessions.
- Kick Wheels: Quiet, traditional, and great for schools or meditative throwing.
• Power & Torque
Look for enough torque to center your typical clay amounts without slowing down.
• Cleanup & Workflow
Splash pan design, removable heads, and bat systems make cleanup easier.
If you’re outfitting a compact studio, wheels like the Speedball Artista Pottery Wheel, if you need to tuck away the wheel in between throwing sessions or the Bailey ST-X Pottery Wheel for an all in one package!
3. Kiln Selection: The Heart of Your Studio

Nothing transforms your home practice like owning a kiln. If your home situation does not allow for a kiln set up find a local studio to fire your pieces! Here’s what to consider when looking for a kiln:
• Kiln Type
- Electric Kilns: Most common for home studios. Easy to use, consistent results, available in many sizes.
- Gas Kilns: Typically for outdoor use or professional settings.
• Size & Capacity
Ask yourself: What size pieces do I make most often? How much space do I have for the kiln?
Smaller top-loading kilns are great for beginners and small studios. Larger kilns are best for production potters.
• Power Requirements
- Small kilns may run on 120V outlets
- Larger kilns typically require 240V
Always hire a licensed electrician for kiln installation.
• Ventilation
Every kiln should have proper ventilation for safety, whether through a dedicated vent system or a well-ventilated area like an open garage.
If you are looking for a kiln for a compact home studio the Paragon Caldera-XL Test Kiln is a great option. This kiln operates off 120 volts which make it ideal for someone who doesn’t want to make any changes to their electrical systems.
4. Clay, Tools & Studio Essentials

Your day-to-day workflow depends on reliable, well-organized tools. Here’s what your home studio should include:
• Clay
Choose bodies based on your kiln’s firing range (cone 04, cone 5/6, cone 10).
Popular options:
- Stoneware
- Porcelain
- Earthenware
• Tools
Every studio needs:
- Trimming tools
- Ribs (metal, wood, silicone)
- Sponge set
- Wooden modeling tools
- Cutting wire
- Needle tool
- Brushes for slip & glaze
Upgrading to pro-level tools such as Japanese trimming sets, MKM rollers, or an artist tool bag brings long-term workflow benefits.
This Xiem Clay Essential Tool Kit gives you everything except for the brushes.
For brushes we highly recommend the Taklon Soft Grip 7 Brush Set to start glazing your projects at home.
• Wedging Board
A sturdy surface like the Xiem wedging board keeps clay clean and minimizes dust.
• Bats
Bats are essential for removing thrown pieces from the wheel without warping.
5. Worktables & Surfaces

Thoughtful table selection makes clay work easier and more ergonomic, especially long-term.
Ideal Table Setup:
- Counter-height or adjustable tables
- Non-porous surfaces like stainless steel, sealed wood, or laminate
- A dedicated table for wet work (slabs, handbuilding)
- A separate table for dry work (glaze testing, trimming)
A good rule of thumb:
If you can’t wipe it down or mop around it easily, don’t put it in a pottery studio.
6. Studio Layout & Workflow
Organize your space so movement feels natural. A good studio flows like this:
- Clay storage
- Wedging area
- Wheel or handbuilding station
- Drying shelves
- Kiln area
- Glazing station
- Final storage or photography area
Keeping “wet” and “dry” processes separate minimizes dust and makes cleanup easier.
7. Drying, Shelving & Storage

Pottery needs space to dry slowly and evenly.
Shelving Options:
- Wire racks
- Slotted metal shelves
- Wooden shelves lined with drywall boards
- Mobile carts for compact studios
Label shelves by stage (greenware, bisque, glazed, finished) to keep everything clear and dust-free.
Clay Storage:
Use airtight buckets or lidded tubs to keep clay moist and workable.
8. Glazing Area Setup
Glazing is messy—plan accordingly.
Key Items for This Zone:
- A dedicated table or cart
- Glaze buckets or pints stored in order
- Mixing tools for stirring
- Brushes, ladles, and dipping tongs
- Newspaper or canvas drop cloth
- A small fan or ventilation
If space is tight, many potters use rolling carts that tuck away when not in use.
9. Ventilation & Safety
Pottery studios must manage dust and heat safely.
Dust Control Tips:
- Mop instead of sweeping
- Wipe surfaces with a damp sponge
- Keep a bucket system for cleaning tools
- Use an air purifier with a HEPA filter
Kiln Safety:
- Install proper kiln venting
- Keep the kiln 18" from any wall
- Install smoke/heat detectors
- Never leave a kiln completely unattended
Your studio should feel inspiring—but also safe and comfortable.
10. Budget-Friendly Ways to Build Your Studio
If you’re starting small:
- Choose a tabletop wheel
- Get a compact kiln like the Paragon Caldera XL
- Use second-hand tables
- Start with a basic tool kit
You can always upgrade as your skills and studio grow.
Build a Studio That Supports Your Creativity
Setting up a home pottery studio is an investment in your craft—and in yourself. With the right tools, thoughtful layout, and a bit of organization, you can create a space that inspires creativity, encourages experimentation, and grows with your artistic journey.
Whether you’re just getting started or upgrading your at-home setup, Bailey Pottery has everything you need—wheels, kilns, tools, clay, glazes, shelving, and expert-tested equipment.
Explore our full selection of studio essentials and start building the pottery workspace you’ve always dreamed of.
About the Author

Related Posts
From Cardboard to Ceramic: How to Make a Berry Basket
Bailey Pottery Gift Guide 2025: 7 Perfect Gifts for Clay Lovers
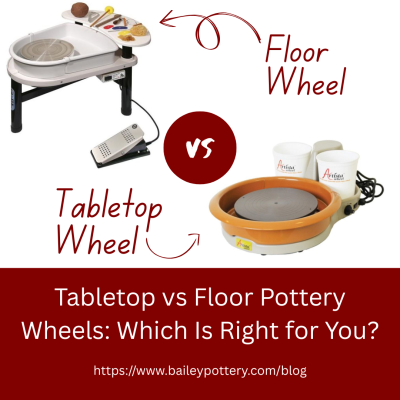
Tabletop vs Floor Pottery Wheels
Designing Custom Gas Kilns for Pottery Studios and Schools