How to Create an Underglaze Transfer using a Photocopy , Our Halloween Project

Follow along as we demonstrate how to create an underglaze transfer using any basic black and white print out or photocopy from a laser printer. Here, we transfer a Halloween themed image in black underglaze onto a leather-hard platter.
The areas that are printed black by your printer’s toner will resist the underglaze. So, the areas that you will be printing from are the areas where there is no toner. If you want an image to look exactly as it appears, you can reverse the black and white fields in computer editing software prior to printing. Also, note that however your image appears will be flipped once transferred. If you are using an image with any words you will want to flip the letters so that they transfer legibly.
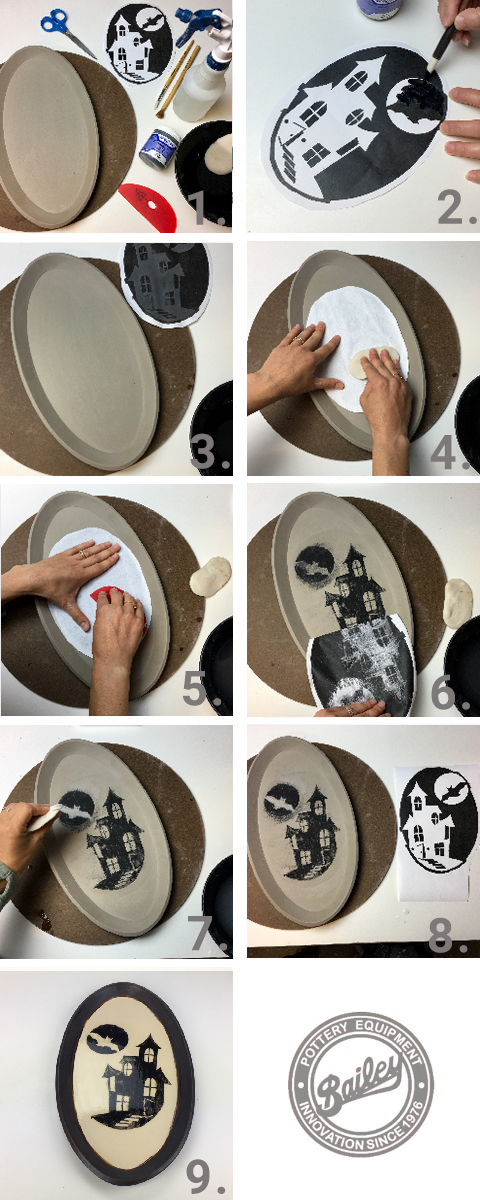
Step 1: Gather your materials. You will need your clay piece or a slab in a leather-hard state, a graphic, black and white photocopy or computer print-out, cut to match the size of your clay piece, brushes that you will use to fill in the white areas of the print-out, underglaze in colors of your choice, a spray bottle, sponge and water, and a soft clay rib, plus glazes for that final step!
Step 2: Paint into the white areas of your print-out with underglaze. Here, we are using a haunted house image and Spectrum's 515 black underglaze. You will notice that the black area of the print-out resists the water of the underglaze.
Step 3: Apply two thick coats of underglaze to the white areas. Allow the underglaze to dry on the paper. As soon as the underglaze is dry you can transfer it but you can also leave it and transfer the print at a later time. Either way, you want to transfer onto a leather hard clay piece.
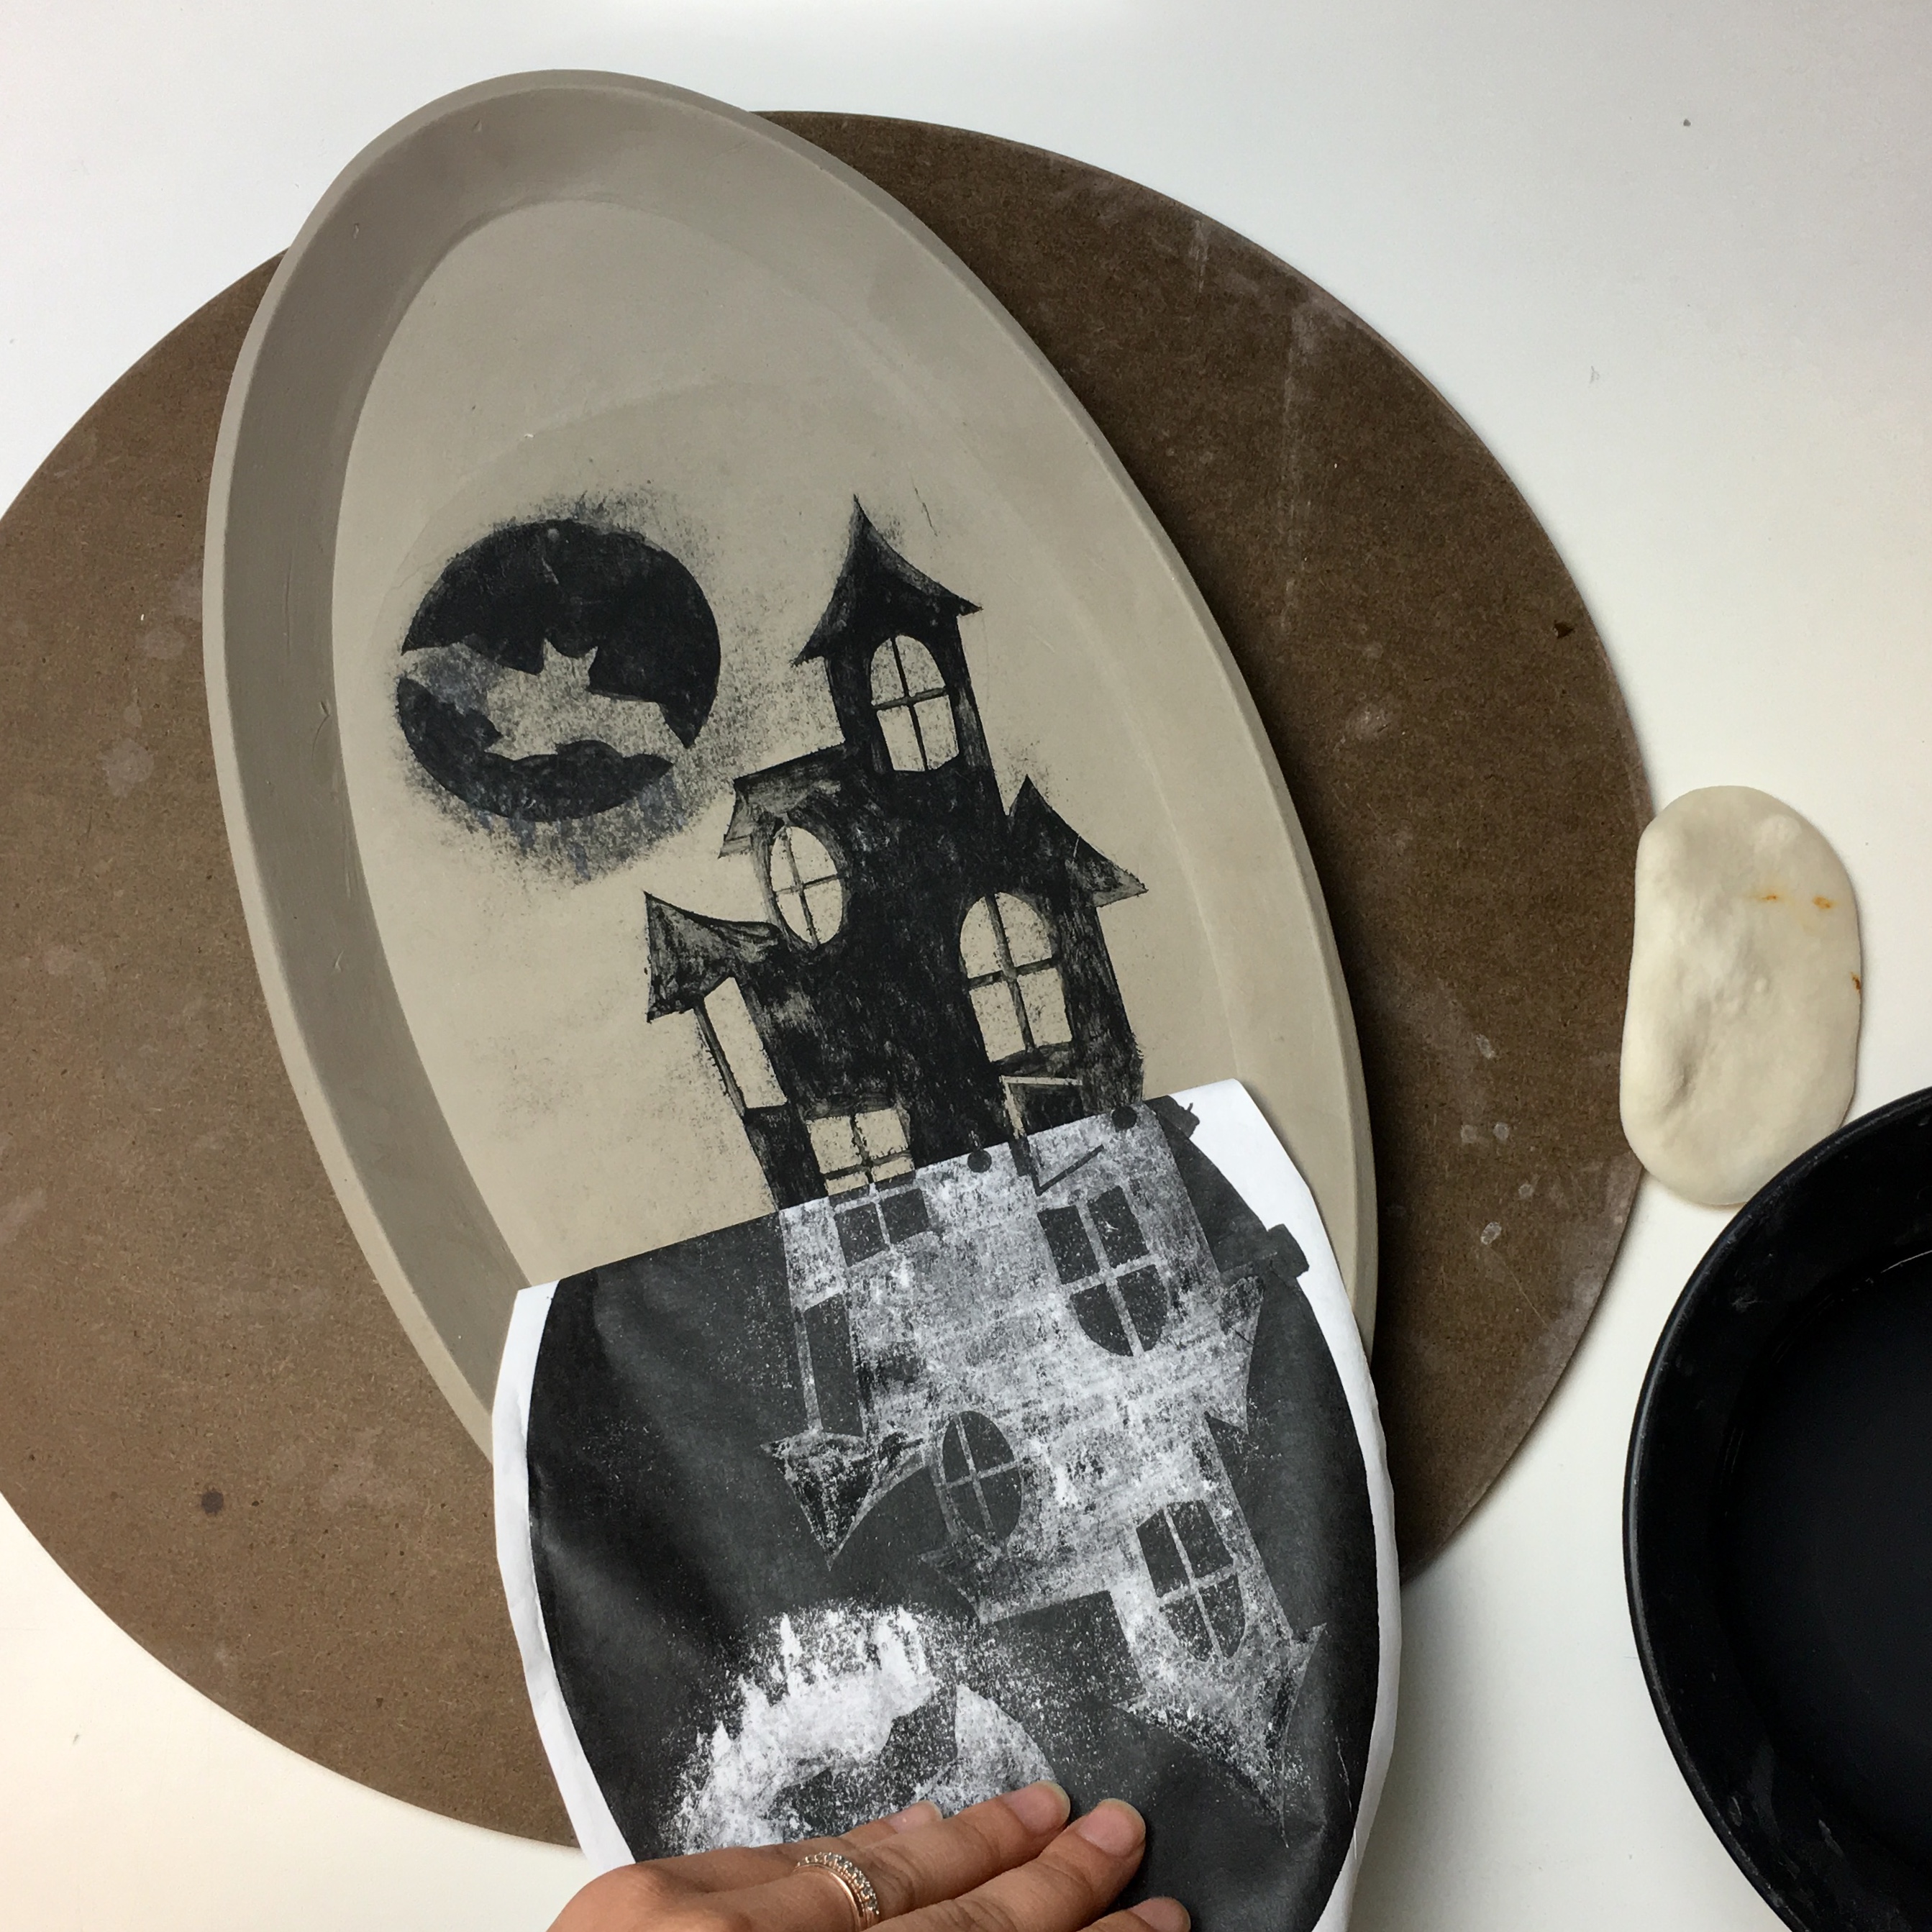
Step 4: Place your underglaze transfer face down against the clay piece and use a spray bottle to add a light mist of water to the back of the paper. Begin to rub the back of the paper with a sponge.
Step 5: Continue to rub the back of the paper, taking care not to rip it. Use your soft rubber rib to encourage the underglaze to transfer. If you need to add more water you can do so.
Step 6: Peel the paper off of the clay piece. If you notice an area has not transferred put the paper back in place and continue to rub adding small amounts of water as necessary.
Step 7: Clean up any smudges or messy areas with gentle sponging. At this point, you can also add more free-hand underglaze painting.
Step 8: Allow your piece to dry, then bisque and glaze fire. We bisque-fired our Tuckers Mid Smooth Stone Cone 5-6 clay to Cone 04, then applied Mayco's SW-111 Wrought Iron around the edge and Mayco's SW-004 Zinc Free Clear over the design area.
Step 9: Fill with Halloween Treats and Enjoy!
About the Author