Glazing and Finishing Project, Part 2: Glazing and Finishing with Color and Sparkle!

Lot's of gift giving occasions seem to come up in May. Now is the time to start making some quick and easy coasters for Mom or the newlyweds! If you missed Part 1: Forming Coasters you can see the post here but then be sure to come back because we are about to jump into glazing!
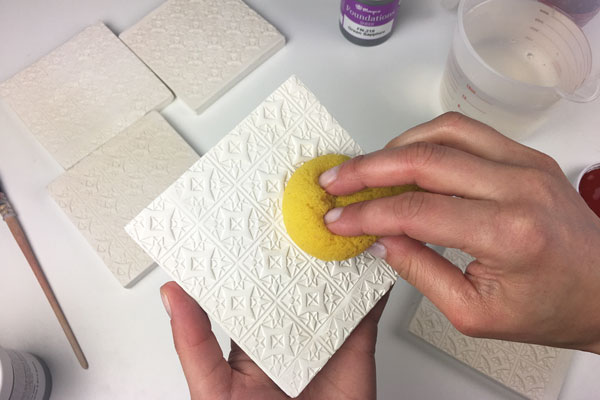
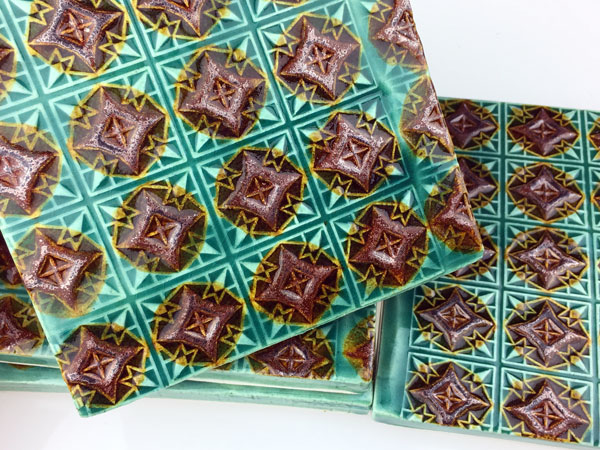
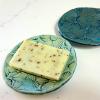
Wipe bisqueware clean with a damp sponge prior to glazing. This should be done every time you glaze to prevent dust from interfering with glaze adhesion. Look at your piece and decide on a plan for glazing. I decided to work into the pre-existing pattern of the form that was created with the textured hand roller in the raw clay.
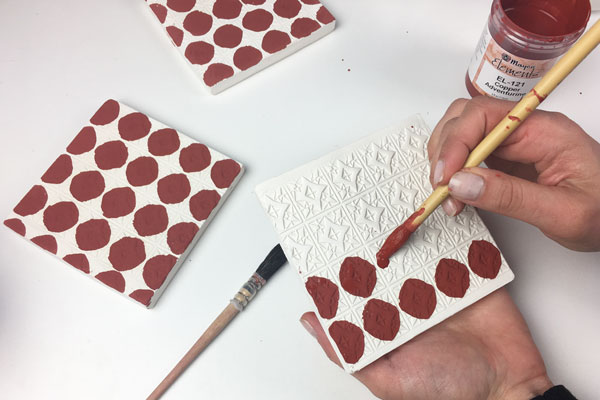
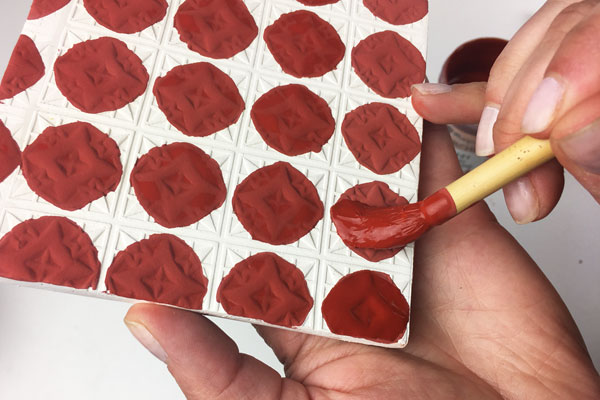
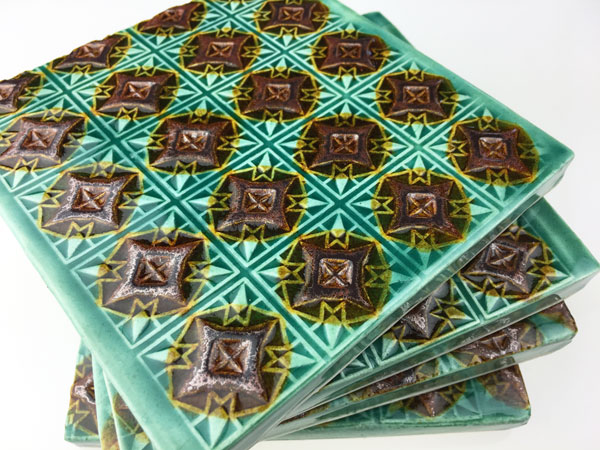
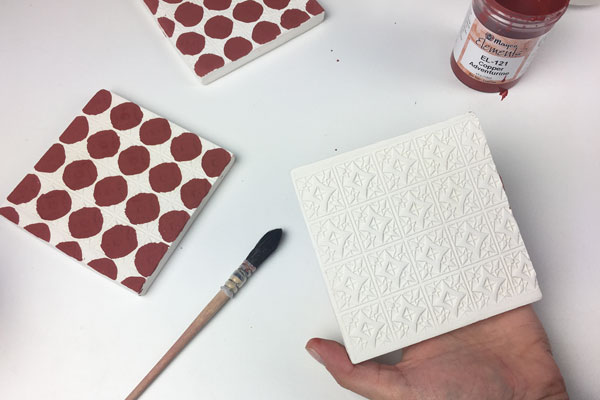
I brushed Mayco Elements Copper Adventurine glaze onto the bisque ware in thick even strokes. Following the textured lines of the bisque ware, I free-handed a pattern with glaze. Luckily, the fluidity of these glazes is forgiving to imperfections so there is no need to worry about creating perfect shapes. Most commercial glazes require two to three coats of glaze for best results. Because I applied thick applications of glaze, I only needed two coats here.
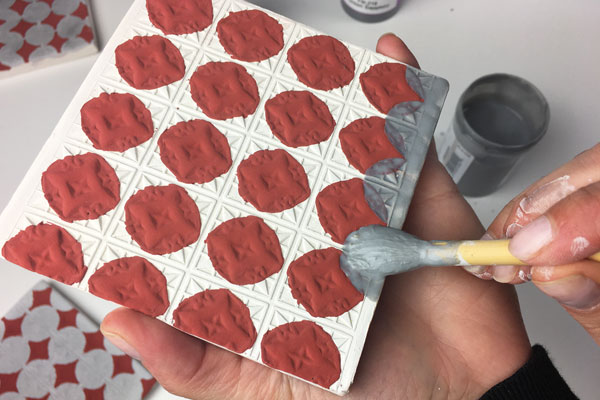
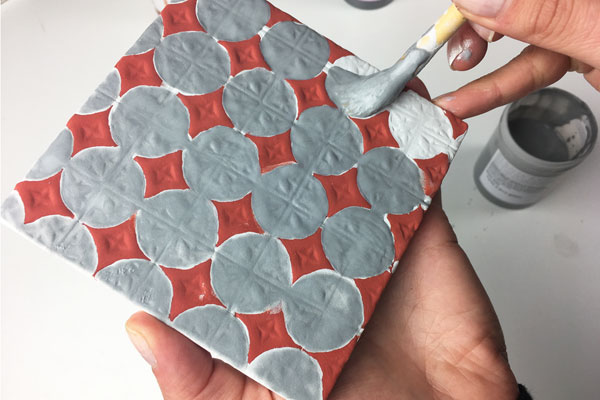
Next, I brushed two coats of Mayco Elements Lapis Lagoon glaze in the remaining unglazed spaces and overlapped it on select parts of the piece glazed with the Copper Adventurine. The areas where the glazes overlap blend in the kiln firing to create a third amber color.
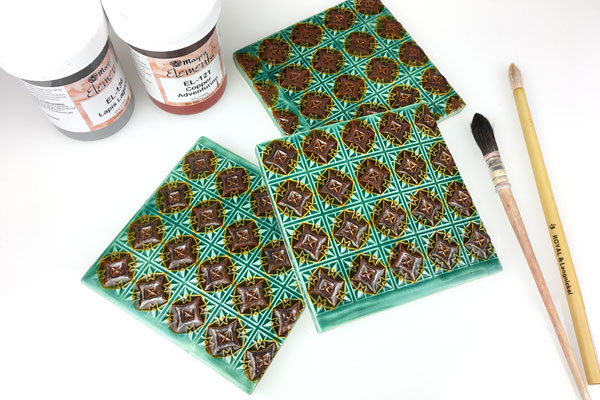
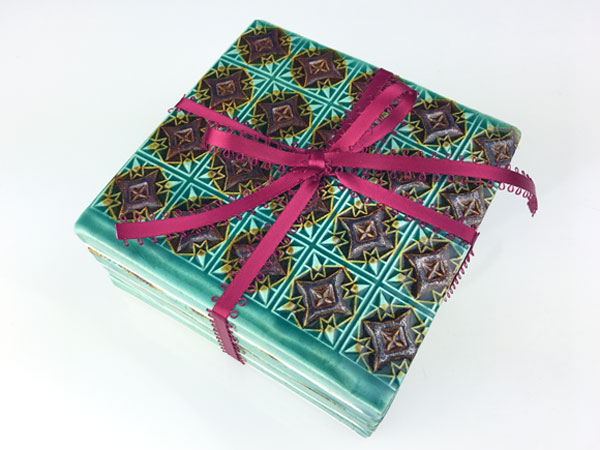
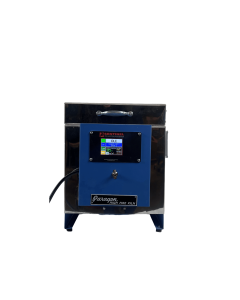
These pieces were fired in a Paragon 1130 test kiln to Cone 04. To finish the coasters, self adhesive 1/2" Cork Stick-Ons were added to the underside.
Try out these Mayco Elements low-fire glazes for yourself. They are lush with movement and color. The Copper Adventurine has an added sparkle that gives a unique finish to any surface!
April 18, 2017
|
View: 3479
|
Categories: Tips & Techniques
|
By: <a class="mp-info" href="https://www.baileypottery.com/blog/author/lyla-at-baileys.html">Lyla @ Baileys</a>
About the Author

Related Products


Helpful Hints on Clay Storage
August 4, 2016

DIY Hand-Built Bowl
October 2, 2017

The 5 Types of Kiln Shelves You Need to Know About
May 16, 2017

Designing Custom Gas Kilns for Pottery Studios and Schools
March 18, 2026
Who Are Pugmills For?
March 6, 2026
Tabletop vs Floor Pottery Wheels
March 4, 2026