Essential Practice Shapes for Learning the Pottery Wheel


Essential Practice Shapes for Learning the Pottery Wheel

Have you ever tried making a “bad painting?” For beginners, every piece of pottery can feel important and that pressure often leads to tension, rushed decisions, and frustration at the wheel. Letting yourself create practice pieces removes that pressure and creates space for learning. In this blog, we’ll focus on the skills to practice at the pottery wheel, starting with the most important form of all: the cylinder.
Mastering the cylinder gives you the foundation needed to throw almost every other wheel-thrown form. Once that foundation is in place, other shapes become far less intimidating and much more enjoyable.
Why the Cylinder Matters So Much
Many wheel-thrown forms begin as a cylinder. Mugs, bowls, vases, jars, and pitchers all start the same way. When beginners struggle at the wheel, it’s usually because they do not understand the basics. The cylinder is simple to learn and gives beginners a wonderful base to learn other techniques.
Learning to throw a good cylinder teaches:
-
Centering and stability
-
Even wall thickness
-
Consistent pressure
-
Timing and wheel speed
-
Control over height and shape
Before moving on to anything else, it’s worth spending time to learn each step.
Step-by-Step: How Beginners Learn to Throw a Cylinder
During this process do not be afraid to run through each step a few times to help you feel more comfortable. Do not hyperfocus on the final product, rather learn to enjoy each step. Spend the time now, to save time later!
1. Preparing and Centering the Clay

Everything starts with wedging your clay. If you haven't wedged your clay into a cone-like shape, you have a harder time centering your clay on the wheel. Take the time to properly wedge your clay removing air bubbles and breaking down lumps. Be sure to start with softer clay as hard clays can be very difficult to throw, especially for beginners.
Next we center the clay. If the clay isn’t centered, the rest of the process will always feel like a struggle.
As a beginner, focus on:
-
Sitting comfortably and bracing your elbows against your legs or body
-
Using your body weight instead of arm strength
-
Keeping your hands steady and connected

Centering clay is the most important skill in wheel throwing. If the clay isn’t centered, everything that follows will feel difficult or unstable. Centering isn’t about strength, it's about using steady pressure, good body position, and patience.
Start by firmly attaching the clay to the center of the wheel head. Make sure you have placed it firm enough to ensure no air bubbles are trapped between the clay and the wheel. Sit close to the wheel with your feet flat on the floor, bracing your elbows against your legs or hips to stay steady. Turn the wheel on at a medium-to-fast speed and use both hands together to guide the clay upward into a cone shape, then slowly back down into a mound. This motion helps align the clay and brings it into balance.
To center the clay, apply consistent inward pressure and let the wheel do the work. Avoid pushing hard or changing pressure too often. When the clay feels smooth, still, and no longer pushes back against your hands, it’s centered and you're ready to move on.
2. Opening the Clay

Opening introduces structure. Beginners often open too quickly or too deep, which weakens the base.
When opening a cylinder:
-
Open slowly and evenly
-
Leave enough clay at the bottom for strength
-
Compress the base gently to prevent cracking
At this stage, you’re learning how much pressure is actually needed and how little force is required.
3. Pulling the Walls

Pulling is where many beginners try to rush ahead. Instead of focusing on height, focus on evenness and control. When it comes time to pull the walls, reducing the wheel head speed is very important. Slower speeds give you more control and allow the clay to respond gradually instead of moving unpredictably.
Successful wall pulling relies on support from both the inside and the outside of the form. Your inside hand supports the wall and guides the clay upward, while your outside hand provides stability and resistance. The gentle compression between your two hands is what gradually forces the clay upward.
Good pulling practice means:
-
Fewer, slower pulls
-
Consistent pressure from bottom to top
-
Letting the clay rise instead of forcing it
Even short cylinders with smooth, even walls are far more valuable practice than tall, uneven ones.
4. Refining the Shape

Once the walls are pulled, shaping becomes subtle. Small movements matter more than big ones.
This is where beginners learn:
-
When to slow the wheel down
-
How gentle pressure affects the form
-
How to correct wobble while the wheel is spinning
Using throwing ribs can be especially helpful here. Ribs act as a steady guide, helping smooth surfaces, compress walls, and define curves without relying solely on your fingers. They allow you to apply even pressure and make gradual adjustments, which is ideal when refining a cylinder or cup.
For beginners, ribs are best used with light pressure and slower wheel speeds. Rather than reshaping the form completely, ribs help clean up inconsistencies and bring clarity to the shape you’ve already created.
At this stage, the goal isn’t perfection, it's awareness.
5. Finishing and Cutting Off
Before cutting the piece off the wheel:
-
Compress the rim to define the shape
-
Clean excess slip from the base
-
Notice what felt difficult or easy
Once you're done and cut from the wheel, cut your piece in half. You’ll see your mistakes and success easier that way. Then you recycle the clay and try again!

Practice Shapes That Build on the Cylinder
Once throwing a cylinder feels more comfortable, other shapes help expand your skills without overwhelming you.
Tall Cylinders:
Tall forms test everything you’ve learned, centering, pulling, water control, and timing. Try making the tallest cylinder you can make. Make the walls rise until it collapses. This is the time to pay attention to how far you can push the structural integrity of a piece until it crumbles.
Practicing tall cylinders helps you learn when to slow down, when to support the clay, and when to stop pushing further. Over time, you begin to recognize early signs of instability and make adjustments before collapse happens.
When you’re ready to make a tall cylinder without having it fall try this:
After centering and opening, limit yourself to just two or three deliberate pulls. Concentrate on even pressure from bottom to top and pause briefly between pulls to let the clay stiffen slightly. Stop before the cylinder collapses, even if it feels like you could keep going. The goal isn’t maximum height, it’s learning how controlled, patient pulling creates strength.
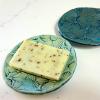
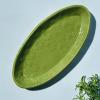
Plates and Shallow Forms: Compression Practice
Plates and other shallow forms may look simple, but they are some of the most challenging pieces to throw well. Because the form is wide and thin, any unevenness in the base or walls becomes immediately visible. This makes plates an excellent practice tool for learning compression and consistency on the pottery wheel.
When throwing plates, beginners quickly learn the importance of thoroughly compressing the base. Without proper compression, plates are prone to cracking or warping during drying and firing. Working with shallow forms also teaches you how to control thickness across a wide surface, encouraging slow, deliberate movements and careful use of pressure.
Practicing plates helps beginners develop patience and precision. These forms require slower wheel speeds, lighter hands, and a focus on stability rather than height. The skills learned here transfer directly to functional pottery like dinnerware, trays, and platters, making shallow forms an essential part of building strong wheel-throwing fundamentals.
How to Practice Without Burning Out
Beginners improve fastest when practice sessions are simple and focused:
-
Choose one form
-
Choose one skill to work on
-
Throw multiple pieces
-
Recycle without guilt
This removes pressure and keeps learning enjoyable.
Learning the Pottery Wheel Takes Time and That’s Normal
No one masters the pottery wheel overnight. Wheel throwing is a physical skill that builds through repetition, patience, and attention to fundamentals. By starting with the cylinder and gradually expanding into other shapes, beginners create a strong foundation that supports everything they’ll make in the future.
The goal isn’t to rush toward finished pieces, it’s to build skills that make throwing feel calm, controlled, and rewarding. Don’t be afraid to make a bad painting.
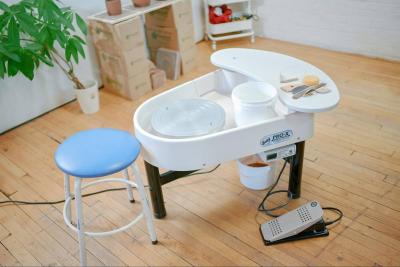
Ready to practice? Browse our pottery wheels, clay, and throwing tools to build a setup that grows with your skills.
About the Author

Related Posts
Bailey Pottery Gift Guide 2025: 7 Perfect Gifts for Clay Lovers
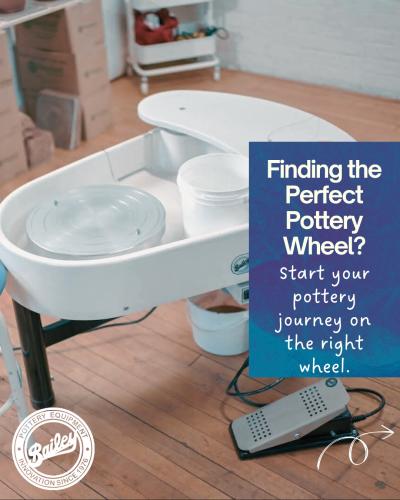
Best Pottery Wheels for Beginners

Tabletop vs Floor Pottery Wheels