Create an Oval Platter for the Holidays!

Create your own ceramic oval platter perfect for serving up holiday dishes. Complete with a leaf motif and a rustic look using oxides and glaze, this design will transform any meal into a celebration! We've got all the tools and the instructions you need to create this ceramic platter. Follow along!
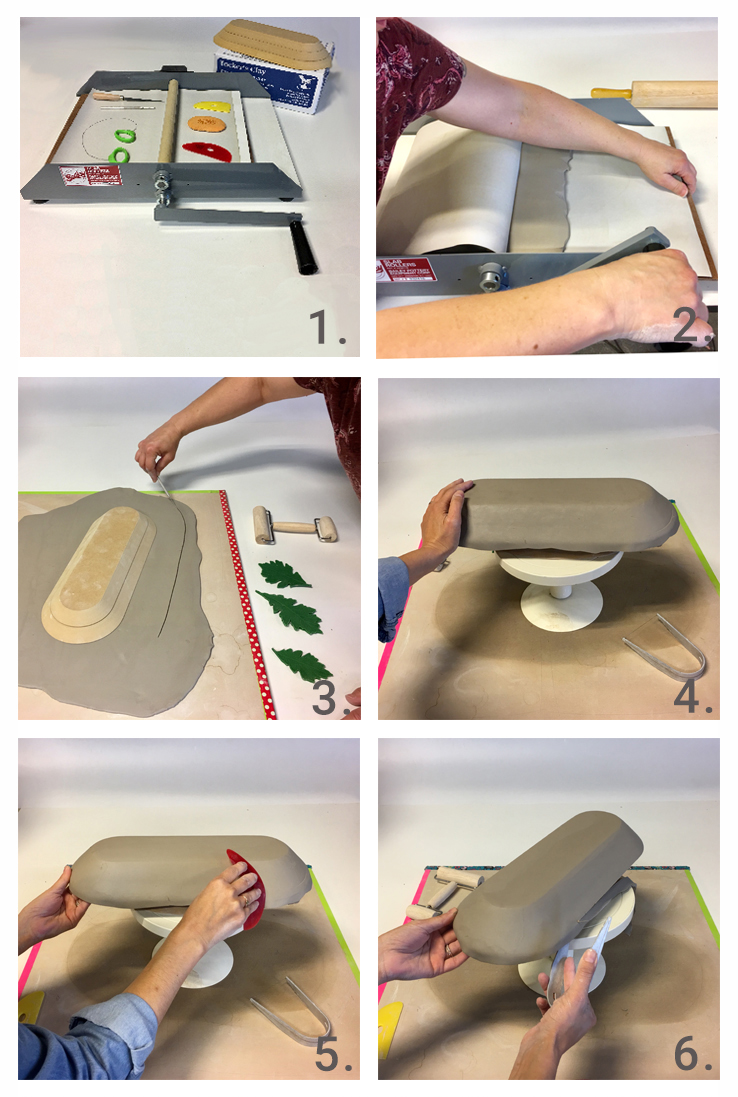
Step 1: Gather your supplies. You'll want to get your tools and materials together just as you will before you cook up your Holiday dishes! We used the Bailey Mini Might II Table Top Slab Roller, Tucker's Mid Smooth Stone Clay, GR Forms 4.5" x 13.5" & 6" x 15" Rounded Rectangle Forms, Clay Art Small Oak Leaf Press Mold Mats, Bailey Banding Wheel, Bailey Fettling Knife Tool, Bailey Needle Tool, Sherrill Mud Mudwire, Sherrill Mud Ribs, Mud Sponge, Mini Roller, van Gilder Aluminum Wire Knife, Calligraphy Brush, Kemper Sponge, a Hake Brush, Georgies Interactive Pigment in Sand & Surf and Georgies Latte GLW32 Glaze.
Step 2: Roll out a nice even slab. We used our Bailey Mini Might II to roll out our slab. We chose Tucker's Mid Smooth Stone clay for this project because in addition to being a great throwing clay, it also hand builds well. The light color of the clay also creates a nice foundation for our glazing.
Step 3: Cut out a piece of clay from the slab to make your platter with. In order to determine the size of clay that you'll need, place your GR Mold down onto your slab face down so that the largest size touches the clay. Trace around the mold form leaving a generous (2-3") margin to work with.
Step 4: Place your GR Mold Form face down on top of a spacer on a banding wheel with a pedestal. Lay your clay slab over the mold. Using the palm of your hand push the clay against the form working from the center of the form outward. When you get to the outside edge gently tuck the clay under the rim.
Step 5: Use a soft, flexible rib to smooth and compress the clay. Again, work from the center out. Define the edge where the flat side meets the wall. This will be the outer foot of the platter.
Step 6: Trim the excess clay that overhangs the mold. The easiest way that we've found to do this is to use a cheese style cutter like the van Gilder Aluminum Wire Knife. Hold the knife in one hand, cut straight up through the clay with the wire and then use your other hand to turn the banding wheel. Keep your first hand steady and allow the wire to make contact with the mold the entire way around.
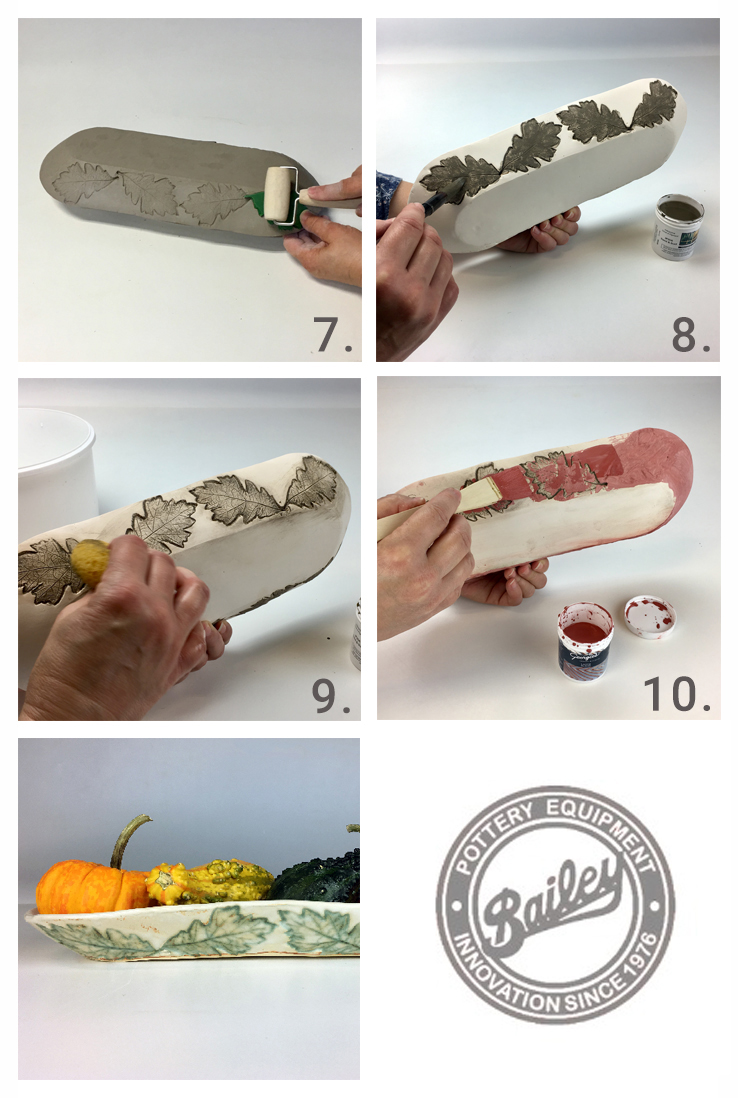
Step 7: Time to decorate! Place a rubber leaf mold face down against the outer rim of the platter. Roll the back side of the leaf with a Mini Roller. Continue to create a pattern. Flip your platter onto a board to dry. Remove the GR Mold out from inside the platter lifting carefully.
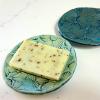
Step 8: Bisque fire to cone 04. We applied Georgies Interactive Pigment in Sand & Surf directly to the imprinted decoration using a calligraphy brush.
A note about Georgies Interactive Pigments: Interactive Pigments are ceramic oxide washes that interact with both your clay and your glaze. They offer warm and rich earth tones. These pigments will offer different results with each clay or glaze you try them with.
Step 9: To highlight the subtle veining of the leaf texture, we decided to go with a lighter "wiped back" application of Georgies' Interactive Pigment. To do so, we actually removed some of the Interactive Pigment using a wet sponge. As you rub the sponge over the design, the glaze that has pooled into the deeper impressions remains while the glaze from the surface is removed. This "wiped back" technique really adds definition to otherwise faint impressions in the clay.
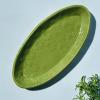
Step 10: The platter is complete with a final application of glaze. We applied two brushed coats of Georgies' GLW32 Latte to our platter and fired it in a Bailey Top Loading Electric Kiln to Cone 5 using the Bartlett 'Slow Glaze' program.
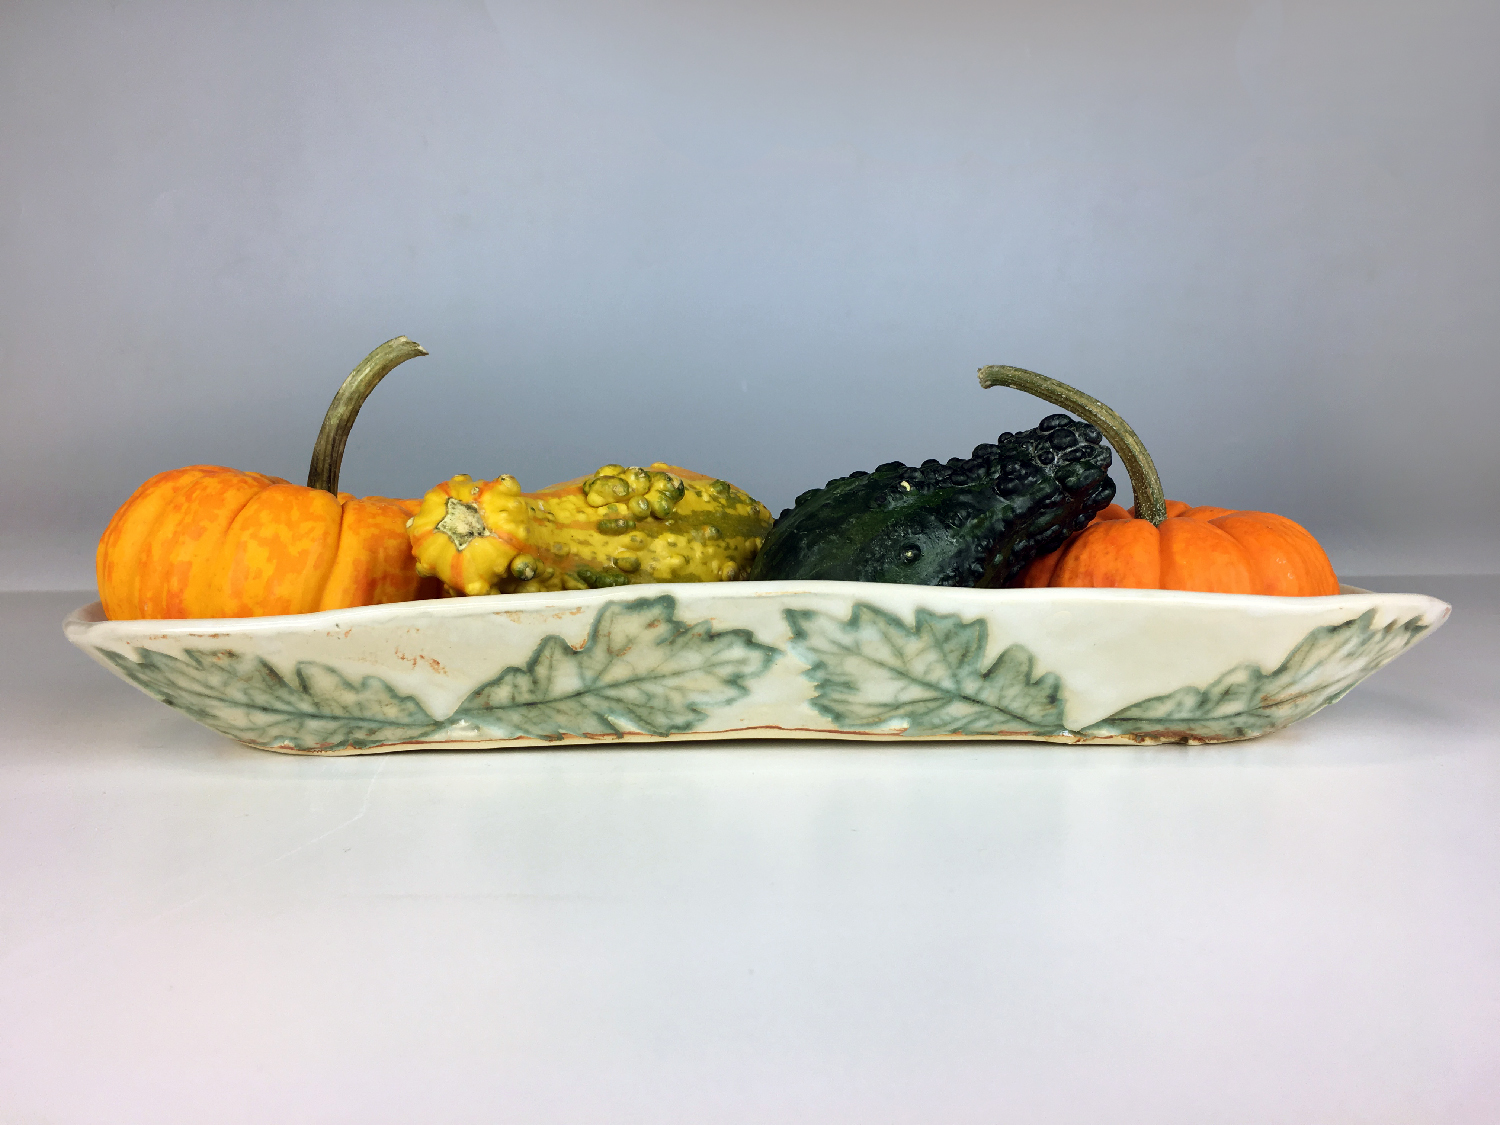
Of course, no holiday platter is really complete until full of goodies. We filled our platter with seasonal gourds for a cozy late-Fall tablescape. We hope that you enjoy this project and are inspired to use some of these techniques in your own work. Tag your projects #MadewithaBailey or #BaileyPottery to be part of our growing community on social. We look forward to seeing what you create!
About the Author

Related Products